After the very painful process of purchasing a vehicle from a dealership, the fun began! For years I´ve been wanting to design and custom built my own tiny mobile home and the time had finally come. Although I really wanted the interior of a Sprinter van, I needed the exterior of an SUV in order to stay low-key and navigate through the city. This led me to pick the Ford Transit Connect as my future house.
Step 1: Taking out the seats
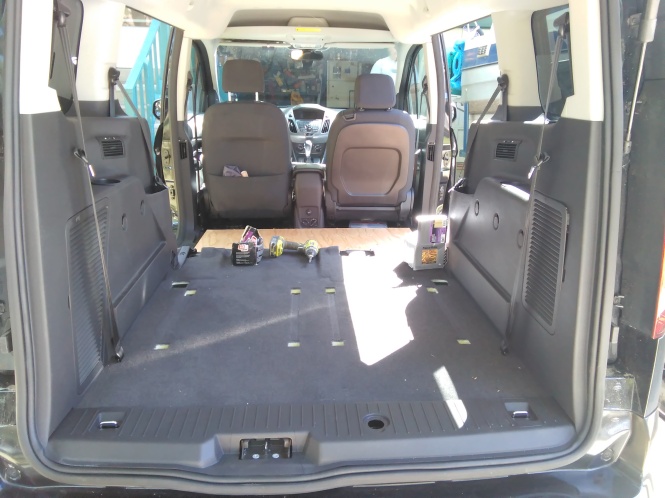
Despite the fact that the seats fold down perfectly flat, I wanted them gone in order to fit a custom bed inside. I did gain a few inches height wise and I have enough space to mount one seat back in if need be.

Step 2: Evening out the floor
Since I bought the Wagon instead of the Van, I had to deal with air ducts behind the front seats. The ducts are made of thin plastic and would me smushed the instant I stepped on one. A large piece of plywood with little legs screwed onto it took care of the issue.
Step 3: Building a bed
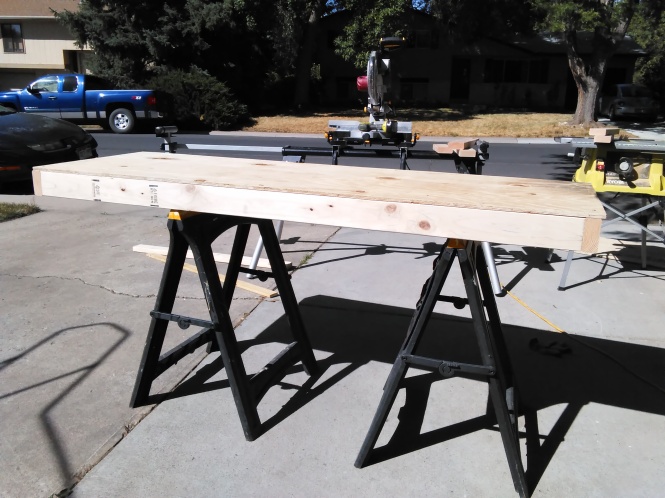
I´d be lying if I said I could have built this without my uncle´s expertise as a handyman. We bought some plywood (top of the bed) and a few framing studs (legs and support underneath), applied nails, used saws, hammers, and various other tools, and ended up with a pretty neat bed.
Afterwards, I spent hours sanding, treating, and painting the wood. It was at this point that my best friend began making fun of my “goth car”. I could do nothing but assure him that color was going to be added soon.
We strapped the bed down in multiple locations and added rubber insulation to the sides in order to keep the car from getting beaten up.
Step 4: Adding storage
My aunt was getting rid of a couple old shoe shelves and before she could say another word, I was nailing them together to create one large unit. After a little sanding and throwing around some paint, I attached them to the bed. Believe it or not, they hold all of my clothes.
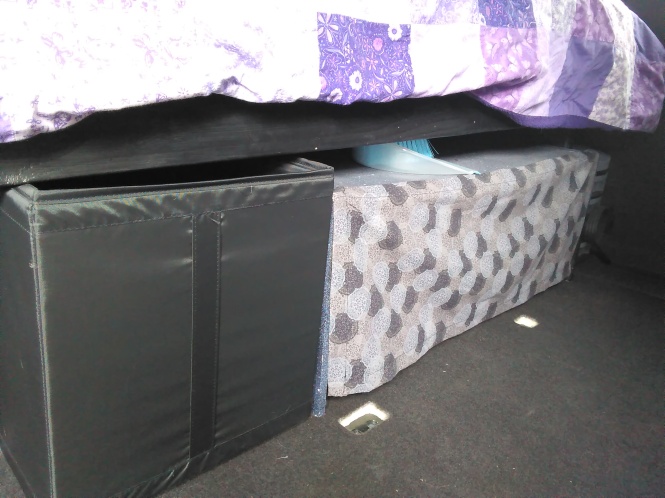
I bought some fabric to hang in front of the shelf via sewn-in magnets, which makes for a cleaner look and keeps my clothes from sliding out. I also bought some fabric storage boxes that fit perfectly underneath the bed.
Step 5: Sewing a mattress
Finding a mattress that´ll fit my oddly sized bed is pretty much impossible and thus I had to be pretty darn creative. My uncle had an old mattress he unsuccessfully had been trying to sell, and decided to donate it to the cause. I took the cover off the little foam pad, threw the pad in the bath tub, and about washed the stuffing out of it (it still smells like pine three months later). I then cut the foam to the right size and pretty much sewed a giant pillow case for it out of an old sheet. Voila!
The mattress is strapped to the bed with two cargo ropes. Otherwise, I´d find myself on the floor by midnight. Now that I am using a sleeping bag, I´ve strapped that to the bed as well. It actually makes for a cozy feeling to be strapped in so securely. And let me tell you, cozy feelings are hard to come by out there.
Step 6: Sewing curtains
Let´s just say the curtains were and still are a little bit of a nightmare for me. I bought two different kinds of fabric: black cotton that hangs towards the window and pretty cotton to hang towards the inside of the car. First of all, don´t ever use cotton for curtains. Imagine trying to cover your windows with wrinkly newspaper, except that it won´t ever flatten. EVER! Also, the curtains ended up way too short for the purpose of completely covering every last crack. But they are pretty; I guess that´s a plus.
Step 7: Adding a safety net
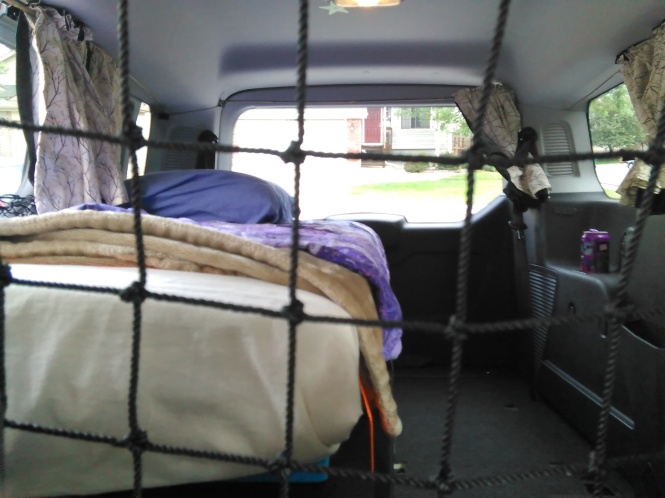
The purpose of the safety net is to a) keep me from getting killed by flying household items in case of a serious accident (Today’s News: Hobo killed by can of tomato soup!), b) provide a professional looking barrier between the front and the back and c) serve as a professional looking attachment area for my screen I put up at night. It holds 350lb and can be detached on one side so I can get to my bed room at night without leaving the vehicle. It wasn´t exactly inexpensive, but it is absolutely worth the price. I had it custom made by some very very very patient experts at US Netting.
Step 8: Decorating, move-in, and little additions
I added some glow-in-the-dark stars to the ceiling, because they are awesome. Period. In addition, they give me something to look at at night when l am listening to my audio books.
I also added a cargo net next to my bed to hold items such as my phone, keys, pepper spray and other items. It also provides a barrier between me and my curtains, which is rather useful considering that I´ve been know to rip down my curtains in my sleep.
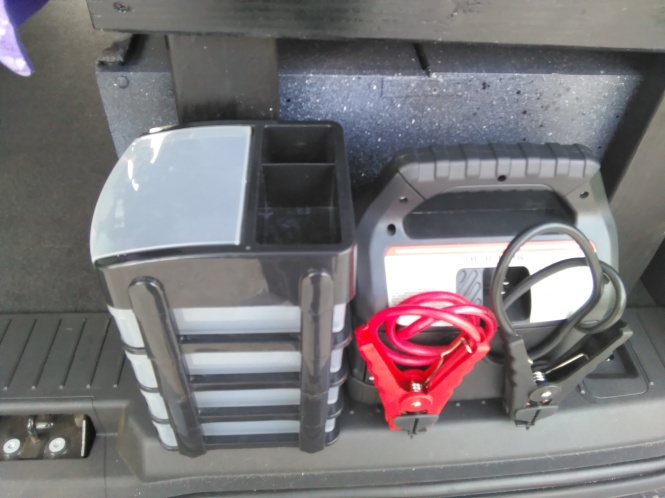
The back behind my bed offers enough space for my all-kinds-of-little-crap drawers and my emergency generator. My new tiny mobile home offers so much more space than my old one did, I don´t even need a storage room anymore.
That´s it fellow hobos. Let me know what you think!
Take care!




I’m thrilled for you. It all sounds wonderful; *wheely* cozy and cleverly efficient (I’m on Wi-Fi at McD’s so I’m still waiting for the images to load). The net is an especially practical touch, perhaps borne out of past experience? In dim light, seen from outside the vehicle, it may even resemble a steel security barrier.
Anyway, enjoy it, you earned it (actually you paid for it also).
And remember, canned soup doesn’t kill people, momentum kills people.
Still waiting for the images to load.
LikeLiked by 1 person
You are absolutely right! Momentum does kill people. Personal experience isn’t as much of a motivator as seeing a full sized mobile home flip on the interstate. I realized that a vehicle basically becomes a huge washing machine with you and everything you own inside of it.
Hope you were able to see the images at some point.
Take care my friend!
LikeLike
Ya crushed it. Awesome little home you’ve built for yourself. It’s obvious that your experience informed every little decision and it seems you’ve thought of everything. Now ya just need to add a pool, hot tub, flames on the side, full sized gym, staircase, and a deep freeze. After that you’re fucking good to go, dude.
LikeLike
A hot tub sounds amazing, especially during cold nights. Maybe there´s space on the roof…? And the flames on the side, gotta have flames! Or maybe stars or sparkles or some psychedelic art!
LikeLiked by 1 person
How awesome is this! Congrats on your new mobile home. Wishing you miles and miles of making wonderful memories.
LikeLiked by 1 person
Well thank you! I am excited to post our adventures here on WordPress for everyone to read : – )
LikeLike